October 05, 2022
Electric coffee grinders can come in handy when brewing large or frequent batches of coffee. Nevertheless, manual grinders can grant baristas more control over their coffee’s grind size while avoiding the additional heat generated by electrical machinery. For those on the market for a new manual grinder for their home or their outdoor camping setup, look no further than
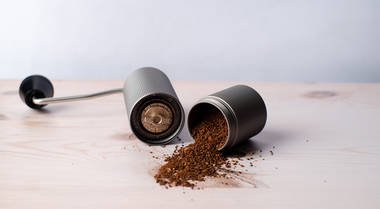
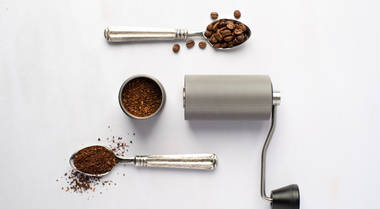
Lardera’s Chestnut C2 Max Grinder.
Versatility and portability are the two main advantages of this high-quality product. Consisting of a 55mm aluminum body that weighs under a pound, coffee drinkers can easily take this grinder anywhere, whether it’s their workplace or on the road. With multiple grind settings available, you can prepare anything from fine espresso to coarser grounds for
French Press and
Pour Over coffee.
Here is a step-by-step guide to using this dynamic device.
Step 1: Unscrew the Bottom Part
At the base of your chestnut grinder, you’ll find the bottom compartment where your grounds will be dispensed. The bottom portion of the top half will have a dial that is used to select your coarseness setting.
Step 2: Select The Coarseness Setting
The dial on the bottom of your grinder’s top half will display three categories: Espresso, Pour Over, and French Press. Within these three settings exist smaller measurements for coarseness, allowing you to control just how fine your espresso or French Press coffee comes out.
For example, Pour Over has micro-adjustments between 18-24 clicks, whereas French Press has micro-adjustments between 25-27 clicks. Select your preferred coarseness setting and proceed to the next step. However, do not grind coffee at the finest setting (0-6 clicks), as this will damage your grinder’s burrs and shorten the useful life of your machine.
Step 3: Screw Back The Bottom and Remove Lid
Once your coarseness setting is in place, screw both halves of your grinder back together. Note that the handle at the top of your grinder is attached to the lid. Unscrew the lid and proceed to the next step.
Step 4: Add Coffee Beans
Pour your coffee beans into your manual grinder. The C2 Max Grinder can hold up to 30g of coffee, so portion your beans prior to pouring them into the machine.
Step 5: Replace Lid and Rotate The Handle
It is now time to screw your grinder’s lid back on and rotate the manual handle. You will feel some tension as the beans are broken up by the grinder’s burrs. Once all tension dissipates, your coffee should be fully ground at a uniform coarseness.
Note that different coffee roasts have different densities. Lighter roasts are denser since they have higher water contents than dark roasts. This makes them slightly tougher to grind than their darker counterparts. Because dark roasts have less moisture and lower density, you’ll need a coarser ground to compensate and achieve a similar extraction to light roasts.
Step 6: Unscrew Bottom To Empty Grounds
Your coffee is now ready for use. Unscrew the bottom compartment of your grinder once again and empty the grounds. Repeat these steps if you need more coffee for your recipe.